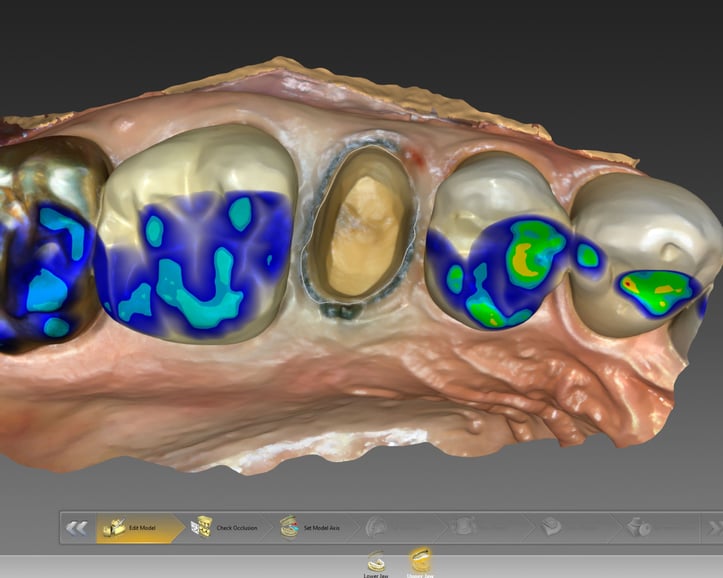
Digital intraoral scanning is a game-changer in modern dentistry, enabling precise prosthetic fabrication, accurate occlusal analysis, and seamless implant planning. However, poor scan quality can lead to ill-fitting restorations, occlusal discrepancies, and increased remakes.
To achieve exceptional scan accuracy, it's essential to follow a systematic approach and implement the best scanning techniques. Below is a step-by-step guide to mastering digital intraoral scanning for optimal clinical outcomes.
🔹 1. Pre-Scan Preparation – Setting Up for Success
✔️ Patient Preparation
- Explain the scanning process to the patient to ensure cooperation and reduce movement.
- Control saliva, blood, and gingival crevicular fluid (GCF) as excessive moisture can interfere with scan accuracy.
- If scanning metallic restorations, consider using anti-glare spray or scanning powder to reduce reflection artifacts.
✔️ Scanner Preparation
- Check the scanner lens (optical window) for fogging or debris and clean if necessary.
- Ensure the scanning software is updated and that AI-driven optimization features are activated.
- Preheat the scanner to prevent fogging, which can occur when there is a temperature difference between the scanner and the intraoral environment.
🔹 2. Ideal Scanning Sequence – Systematic and Efficient
A well-structured scanning sequence prevents data gaps and minimizes scanning errors. While workflows may vary depending on the scanner and clinical case, the recommended sequence is as follows:
▶ Full-Arch Scanning Protocol
1️⃣ Start with the occlusal surfaces, followed by the lingual and buccal surfaces
- Maintaining a consistent scan flow minimizes overlap errors.
2️⃣ Begin scanning from the posterior molars and move toward the anterior teeth - Scanning larger, more stable structures first improves data alignment.
3️⃣ Complete one arch (maxillary or mandibular) before moving to the opposing arch
4️⃣ Capture the occlusion (bite registration) last - Instruct the patient to bite naturally, then scan the left and right sides for 3–5 seconds each.

🔹 3. Advanced Techniques – Optimizing Scan Quality
📌 1. Maintain Proper Distance and Angle
- Ideal scanning distance: 5–15mm from the tooth surface for optimal focus.
- Avoid excessive tilt – the scanner should be as perpendicular as possible to the scanned surface.
- For sloped surfaces, a 30–45° tilt may be necessary to capture fine details.
📌 2. Smooth, Controlled Movements – Consistency is Key
- Avoid sudden stops and jerky movements, which can cause scan distortions.
- Move the scanner at a steady pace (5–10mm per second) to prevent missing data.
- Minimize back-and-forth motions—maintain a single, continuous scan path.
📌 3. Minimize Soft Tissue Interference
- Retract the lips, cheeks, and tongue adequately to prevent unwanted soft tissue artifacts.
- Ensure that the scanner only captures the necessary anatomical structures for a clean, accurate scan.
- Pay special attention to the lingual and buccal areas, where soft tissue can easily interfere with the scan.
📌 4. Live Monitoring & Rescanning for Accuracy
- Most intraoral scanners offer real-time preview modes—use this feature to detect errors immediately.
- If a scan is incomplete or inaccurate, rescan only the specific missing areas to avoid unnecessary data overlaps.
- After scanning, review the data alignment and ensure a complete scan before proceeding.
🔹 4. Special Considerations for Complex Cases
✔ Implant Scanning
- When scanning multiple implants, identical scan bodies can lead to misalignment issues.
- Capture additional angles and use distinctly shaped scan bodies when possible to enhance accuracy.
✔ Bridges & Crowns
- For long-span bridges, ensure that proximal and distal contact areas are fully captured.
- When scanning a crown prep, properly capture the margin by scanning from multiple angles.
✔ Metallic Restorations (Gold Crowns, Amalgam, etc.)
- To reduce glare and distortion, use a light dusting of scanning spray or powder.
- Adjust scanning angles to capture accurate reflection-free data.
✔ Pediatric or Small Oral Cavities
- Use a smaller scanner tip to improve accessibility.
- Prioritize efficiency—minimize scan time to enhance patient comfort.
🔹 5. Post-Scan Verification – Ensuring Data Accuracy
🟢 Final Scan Quality Checklist:
✅ Are all key anatomical structures clearly visible?
✅ Are interproximal contacts fully captured?
✅ Is there any overlay or distortion in the scan data?
✅ Is the occlusion properly registered?
💡 Leverage AI-based quality control features in scanning software for additional error detection.
💡 Rescan any missing areas immediately rather than relying on software-based extrapolation.
🏆 Conclusion: The Ultimate Intraoral Scanning Checklist
✔ Prepare the patient and control intraoral conditions (saliva, blood, reflections).
✔ Follow an optimized scanning sequence (posterior-to-anterior, occlusal-lingual-buccal order).
✔ Maintain a steady scanning pace, proper scanner distance, and minimize soft tissue interference.
✔ Use the correct scanning technique for implants, bridges, and metallic restorations.
✔ Thoroughly review the scan data before finalizing to avoid unnecessary remakes.
A precise intraoral scan enhances restoration accuracy, reduces chair time, and improves clinical outcomes. By implementing these best practices, you can master digital intraoral scanning and optimize your digital workflow!
💬 What scanning protocols do you use in your practice?
Try these expert tips and elevate your scanning precision and dental practice! 🦷✨

COMMENTS